How to Configure Eclipse for Python
Install Eclipse:
- If you haven't already, download and install Eclipse from the official website.
Launch Eclipse:
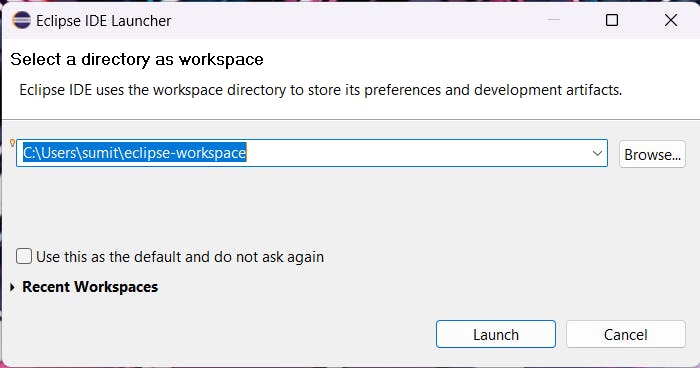
Open Eclipse. You'll see a workspace selection dialog. Choose or create a workspace for your Python projects, then click "Launch."
Download PyDev:
In Eclipse, go to
Help → Install New Software.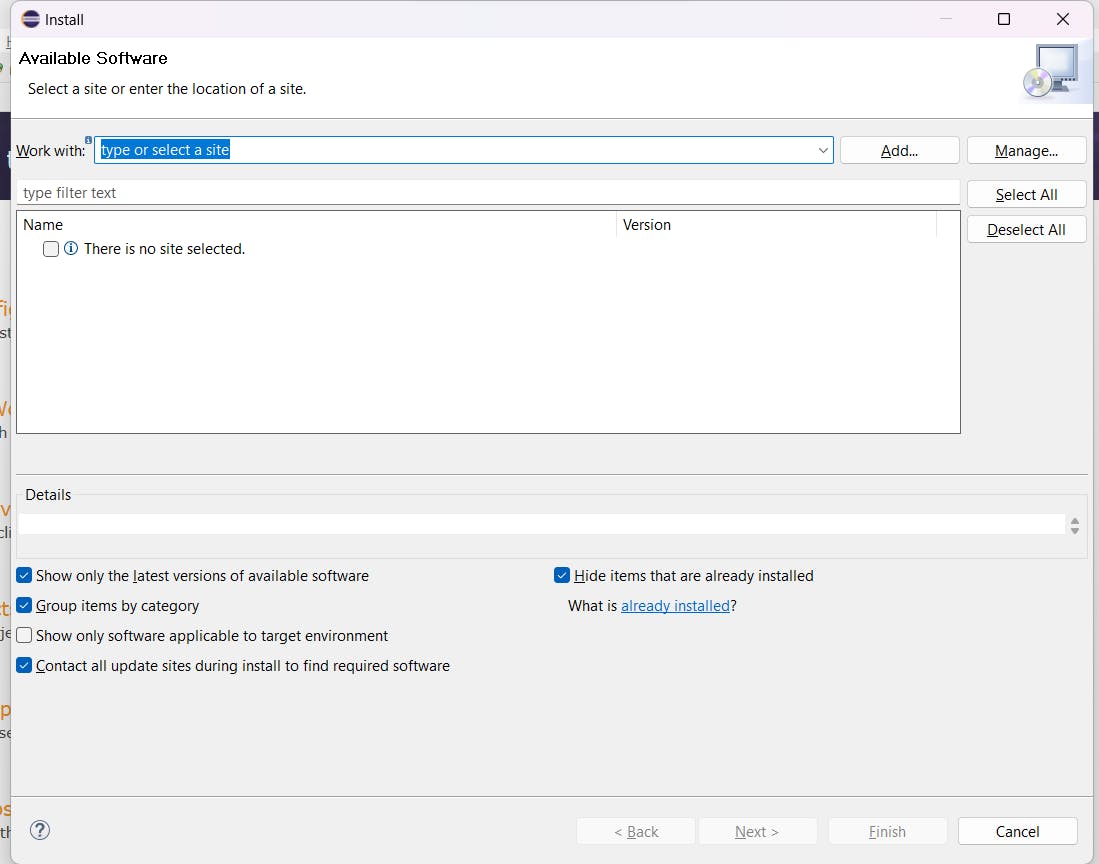
Add PyDev Update Site:
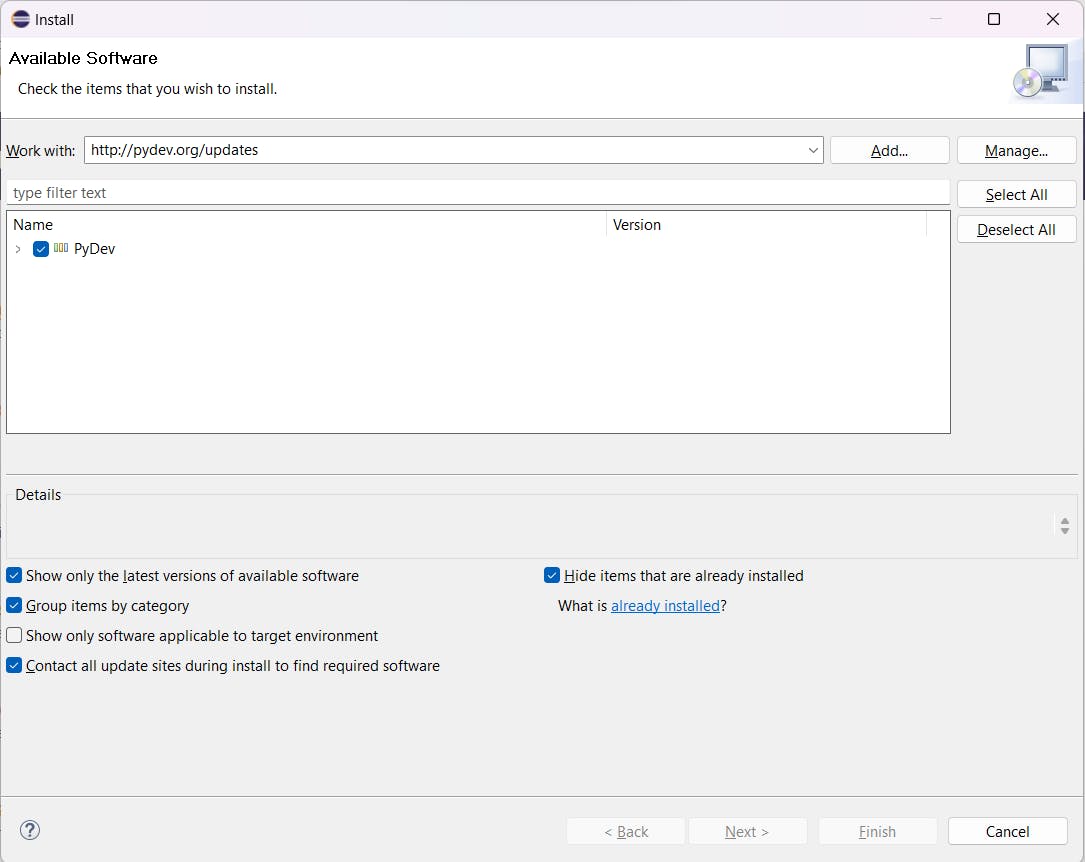
In the "Work with" field, enter "http://pydev.org/updates" and press Enter.
Select PyDev:
- You should see "PyDev for Eclipse" in the available software list. Select it.
Accept License Agreement:
Click "Next" and then "Finish."
Accept the terms of the license agreement.
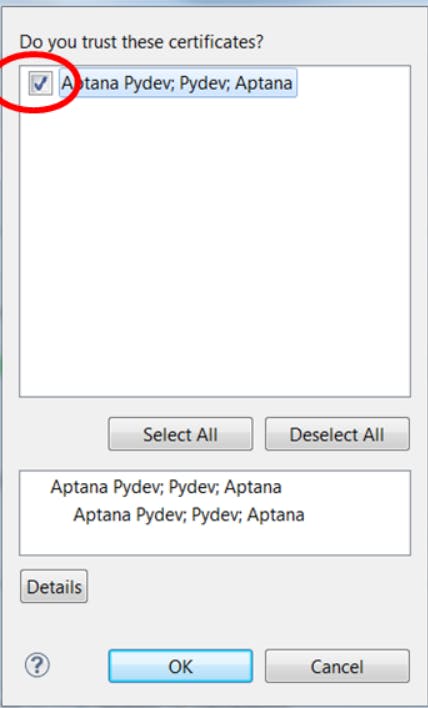
Security Warning:
If a security warning appears, click "OK."
Restart Eclipse:
- When prompted, restart Eclipse to complete the installation.
Configure PyDev:
- Make sure Python is installed on your system before configuring PyDev.
Set Python Interpreter:
In Eclipse, go to
Window → Preferences.Expand
PyDevand selectInterpreter - Python.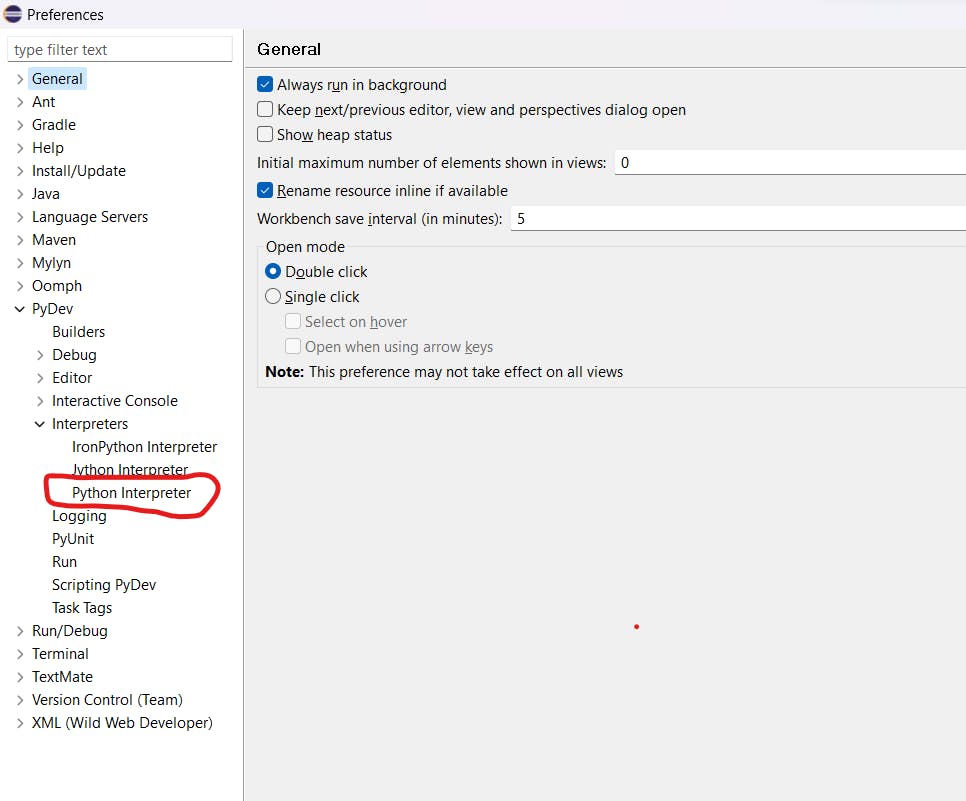
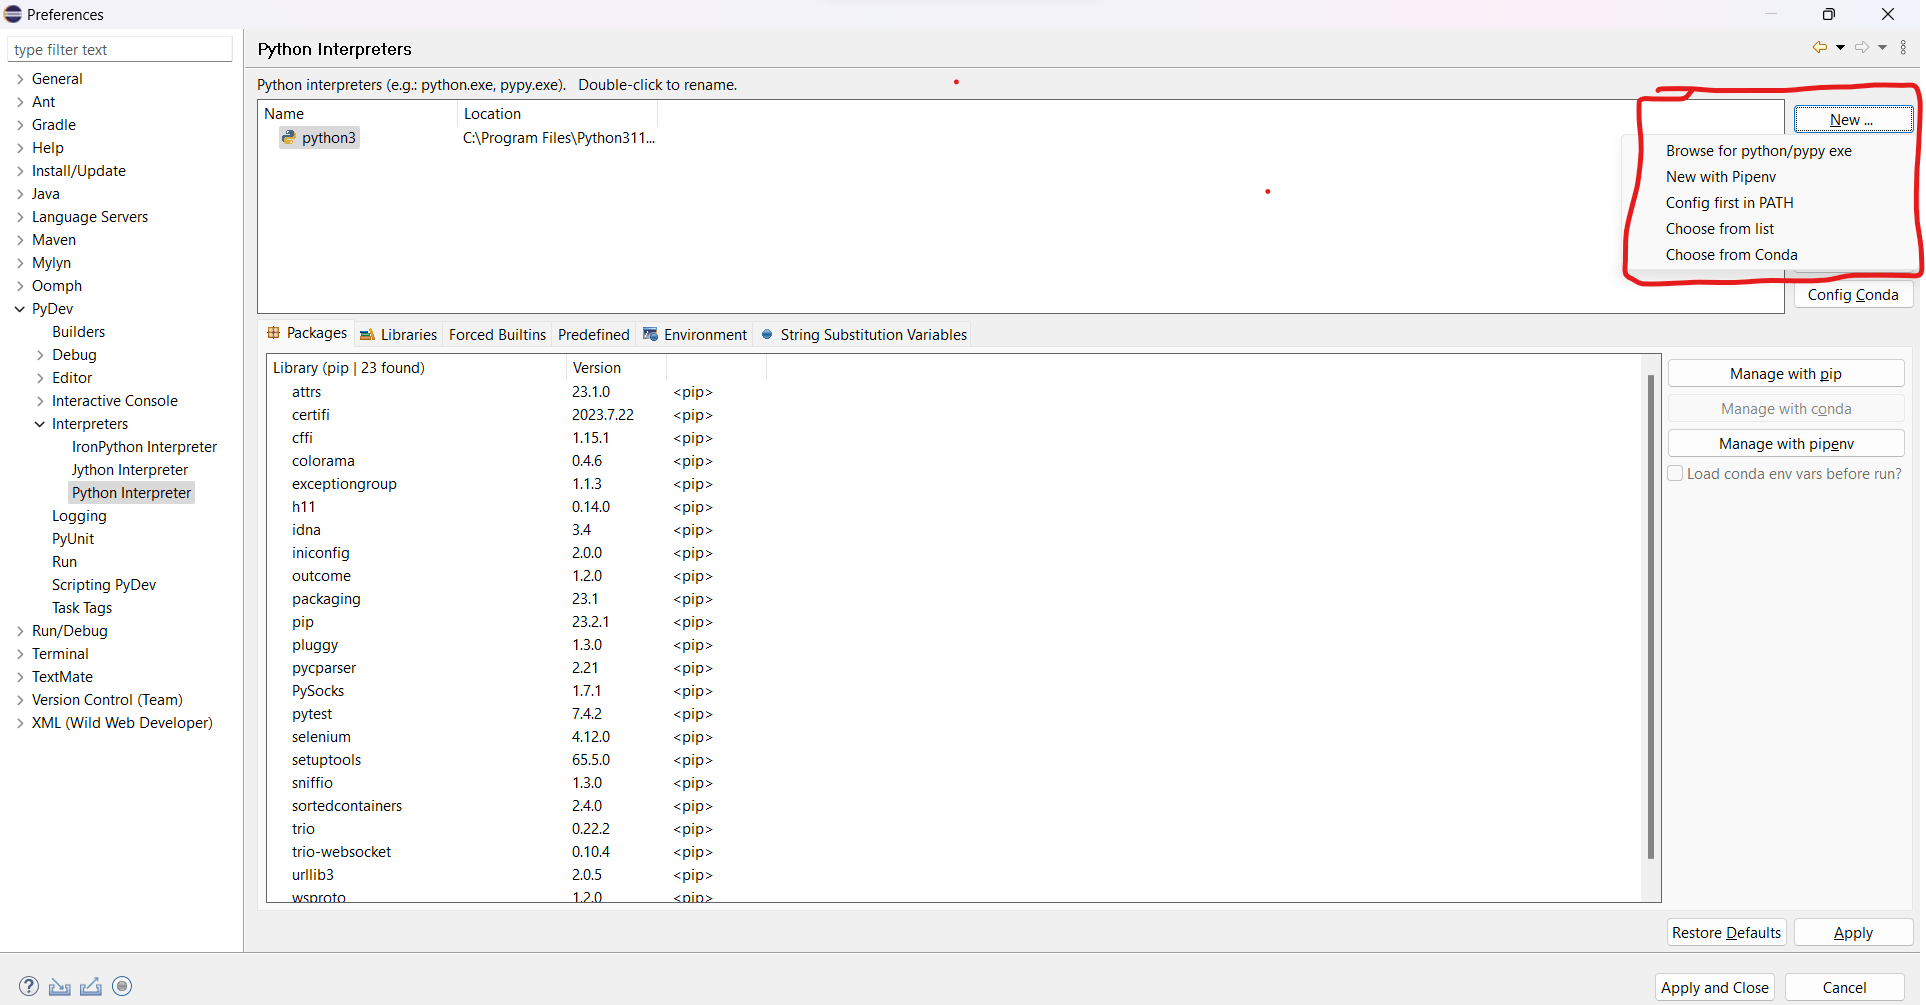
Click "New..." to add a new Python interpreter.
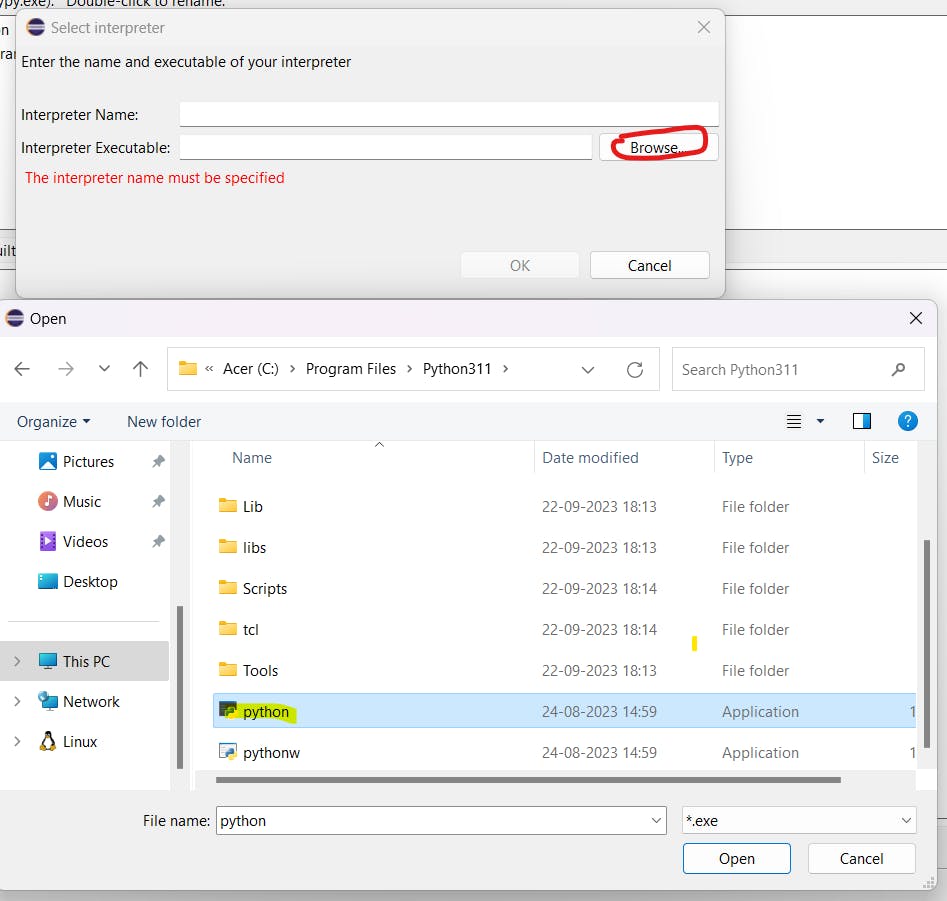
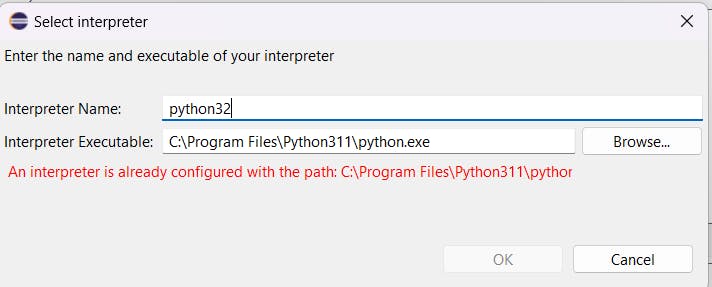
Select "Browse for Python" and locate your Python executable (e.g.,
C:\ProgramFiles\Python32\python.exe).Give the interpreter a name (e.g., "Python32").
Apply Settings:
Click "Apply" in the Preferences window.
If a "Selection Needed" dialog appears, select all but the "PySrc" and "python32.zip" options and click "OK" as necessary.
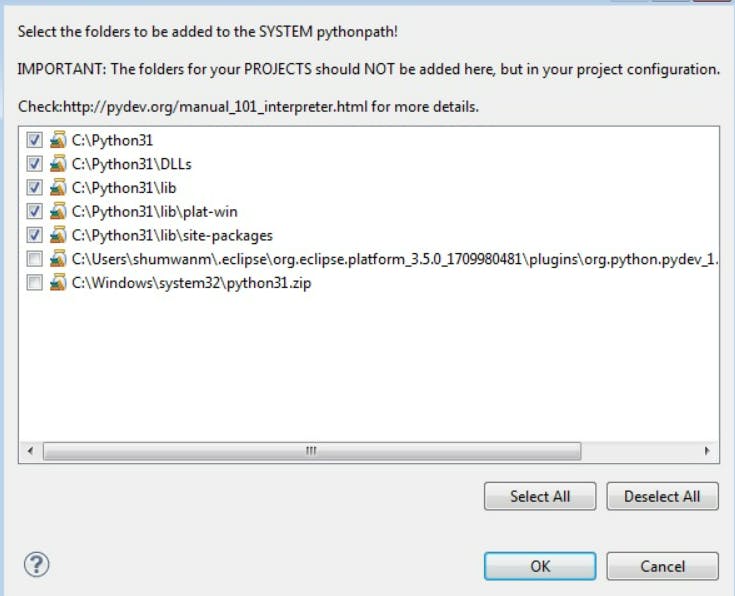
Finalize Configuration:
- The Python interpreter is now set up for PyDev. Click "OK" to exit the Preferences window.
Ready to Code:
- With PyDev configured, you are now ready to create and run Python code in Eclipse.
These steps should help you install and configure PyDev for Python development in Eclipse. If you encounter any issues or have any questions, feel free to ask for further assistance.